
Ambient Occlusion Manual
This manual is an introduction to AmbientOcclusion visualization extension for SketchUp.
The best way to get started is by watching the following tutorial videos:
Video notes:
K-Lite Codec (Allows files to run in Windows Media Player)
VLC Player
HandBrake – (Allows conversion of video files)
Animator Tutorials
Fredo6 Tutorial 1 – Preparing a Model
Fredo6 Tutorial 2 – Creating a First Animation
Fredo6 Tutorial 3 – Finishing Animation
The SketchUp Essentials Moving Animation Tutorial
The SketchUp Essentials Moving Jobsite Animation Tutorial
Model Credit – Farnsworth House by Aaron Davies
Model Credit – 1967 Shelby Mustang G.T. 500 by Mandun
Modes of operation
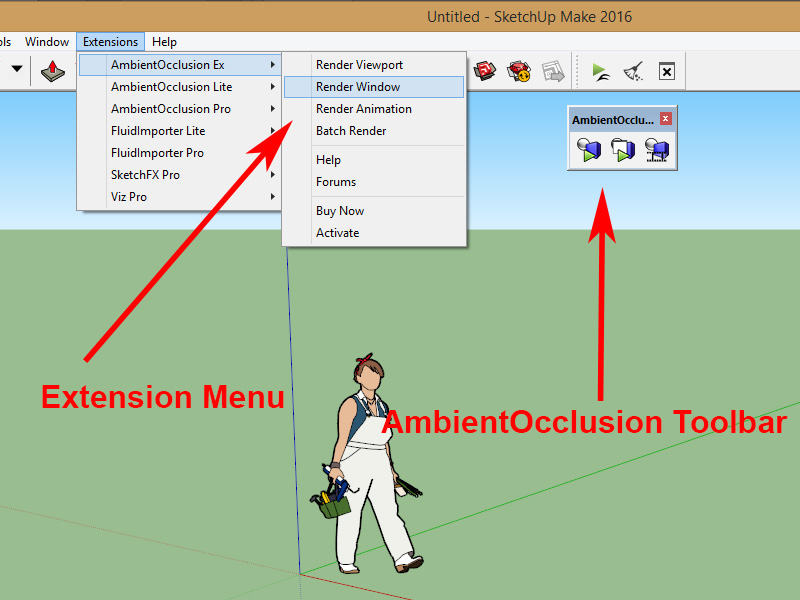
AmbientOcclusion has four modes of operation, “Render Viewport”, “Render Window”, “Render Animation” (Ex version only), “Batch Render”, accessible through the the Extension menu and partially through the AmbientOcclusion Toolbar:
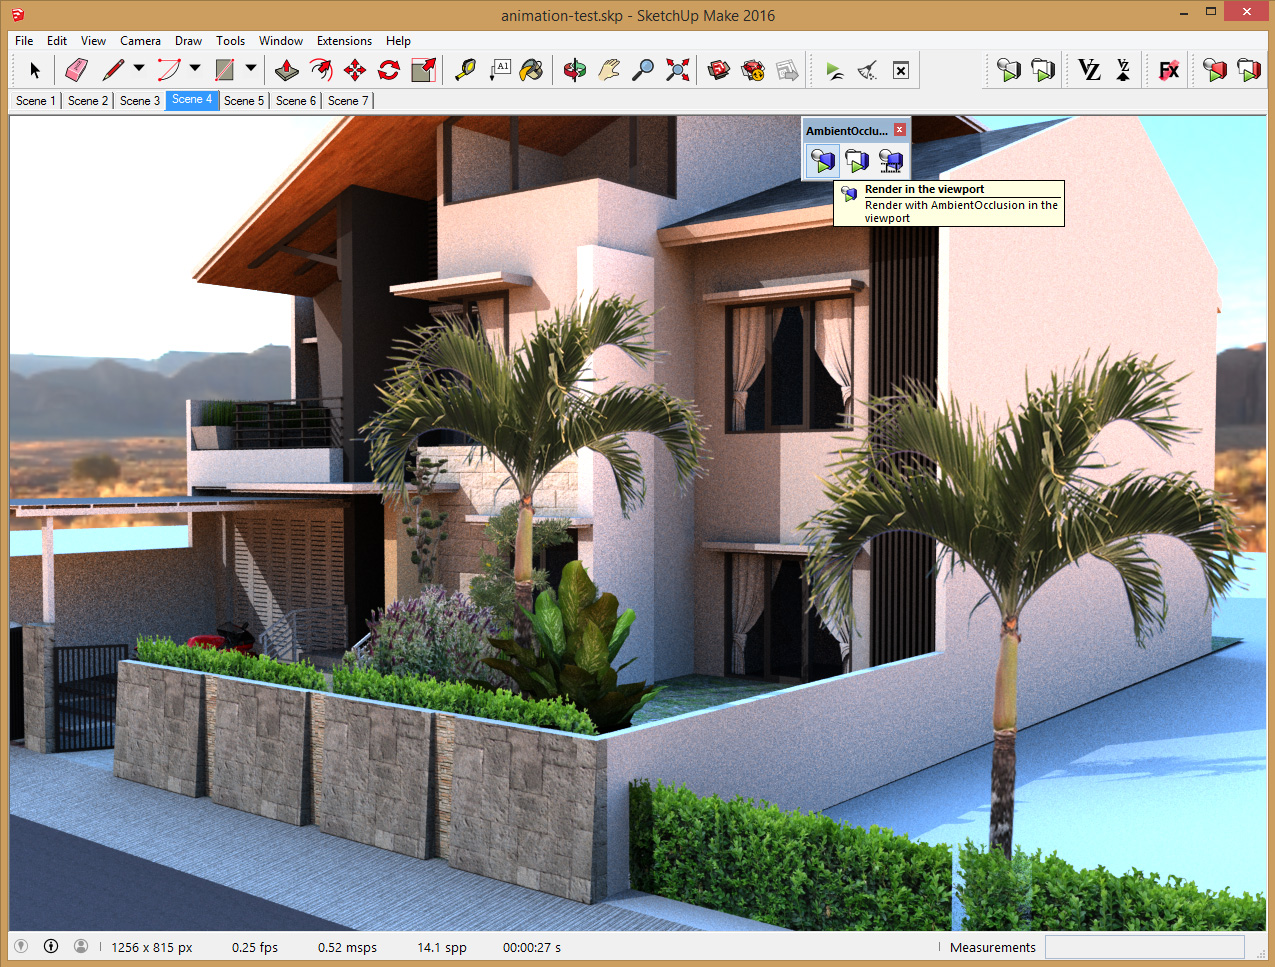
Render Viewport
By selecting “Render Viewport” in the menu or clicking the corresponding button on the toolbar, the rendering is started directly inside the SketchUp viewport, and can be stopped by clicking a second time on the “Render Viewport” button on the toolbar:
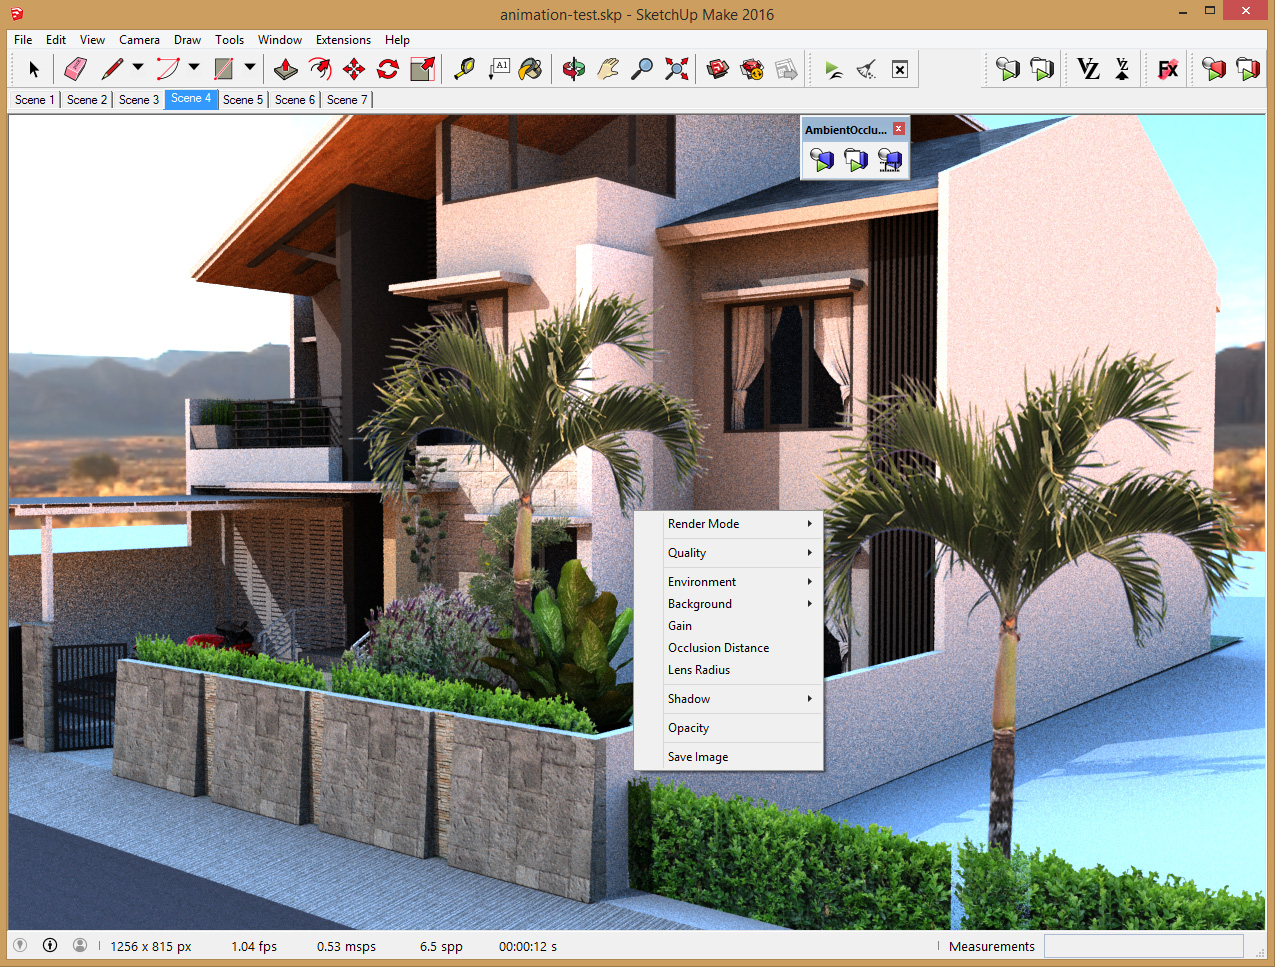
By right-clicking in the viewport during rendering, a menu with all the available rendering parameters pops up:
Render Window
By selecting “Render Window” in the menu or clicking the corresponding button on the toolbar, the rendering is started in a separate window: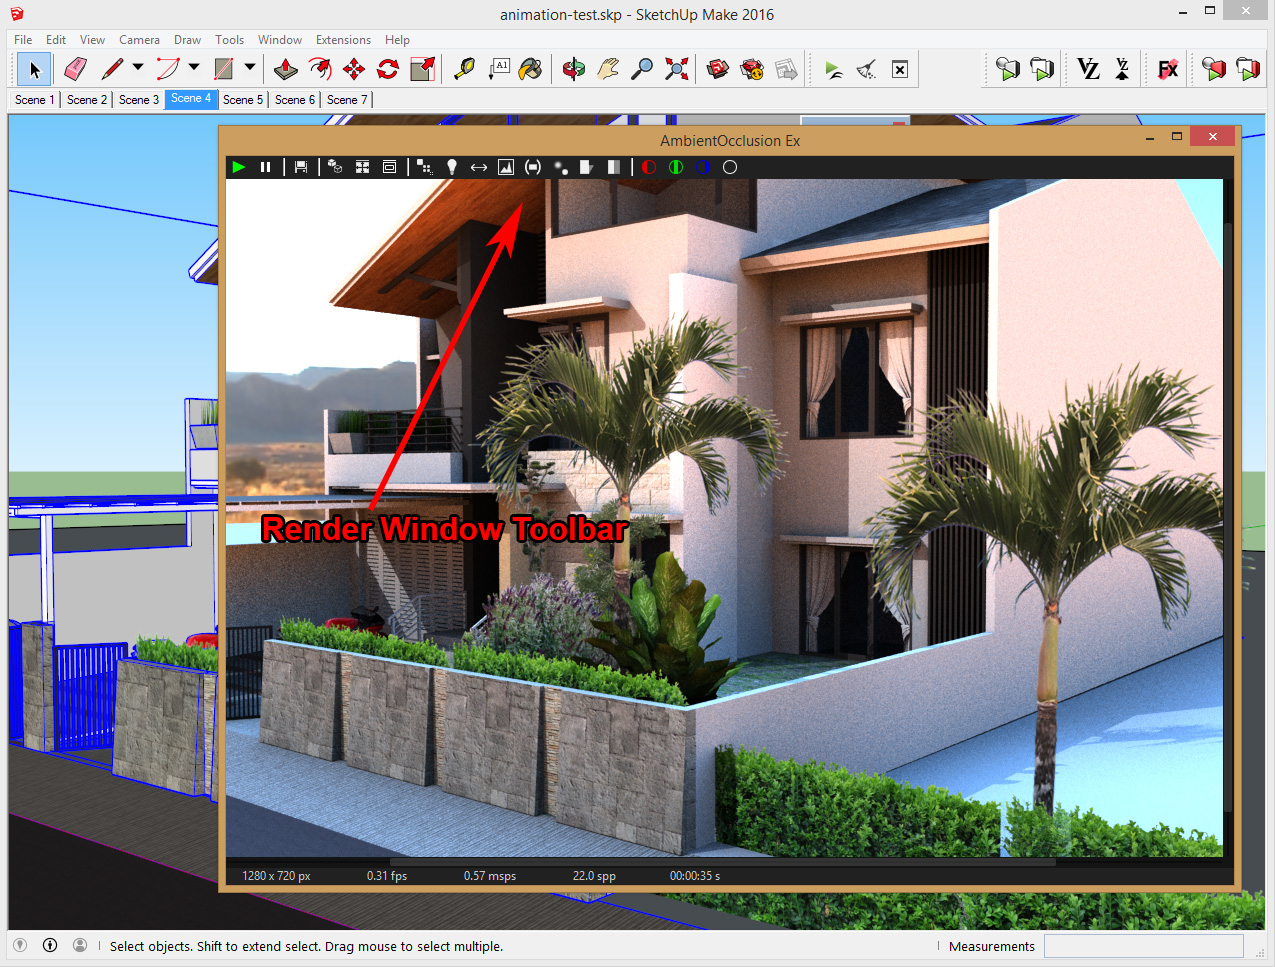
All the rendering parameters are accessible through the Render Window toolbar. The main difference between the Render Viewport and Render Window modes of operation is that in the latter it’s possible to select the rendering resolution, while in the former the resolution is the same as the viewport’s.
Render Animation (Ex version only)
By selecting “Render Animation” in the menu or clicking the corresponding button on the toolbar, it’s possible to render an animation between multiple SketchUp scenes:
The animation dialog provides the following parameters to customize the resulting animation:
- Resolution: the rendering resolution, a higher value will produce a higher definition video, but it will take longer to render.
- Quality: the rendering quality, a higher value will produce clearer (lower noise) renderings, at the expense of a higher rendering time
- Frame Rate: number of rendered frames per second, a higher value will produce a more fluid animation, but it will take longer to generate.
- Bit Rate: quality of the video file, a higher value will produce a clearer video, at the expense of a larger video file.
- Start Scene: first animation scene
- End Scene: last animation scene
- Output File: path to the generated video file
Batch Render
By selecting “Batch Render” in the Extension menu it’s possible to render multiple SketchUp scenes at once: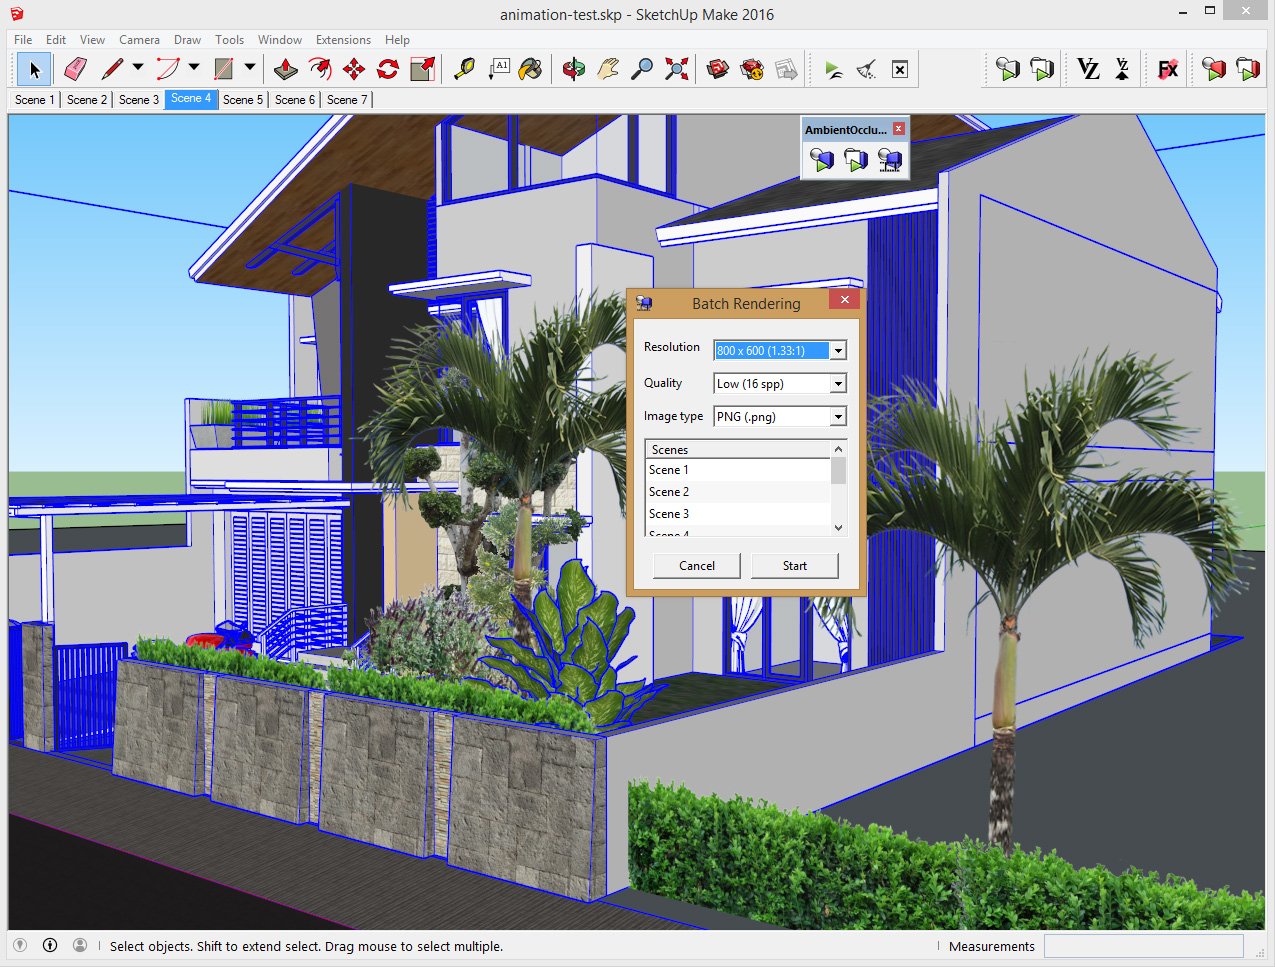
The batch rendering dialog provides the following parameters to customize the rendering output:
- Resolution: the rendering resolution, a higher value will produce a higher definition images, but it will take longer to render.
- Quality: the rendering quality, a higher value will produce clearer (less noise) renderings, at the expense of longer rendering times
- Image Type: the file format used to save the output images
- Scenes: the scenes to be rendered
Rendering Parameters
Render Mode: Here you can select between the classic black and white ambient occlusion without textures, or the extended ambient occlusion with color and textures.
Quality: The quality of the rendered image, in samples per pixel (SPP). Higher values will produce clearer (less noise) renderings, at the expense of longer rendering times. The “Custom” option allows you to run the render and refine the output as much as you want, then save the image when you reach the desired quality.
Environment: It’s possible to use HDRI environment maps as backgrounds as well as for illuminating the scene. Using environment maps to illuminate the scene generates more realistic results. One environment is provided by default (MonumentValley.hdr), and more can be downloaded for free by selecting “Download Environments”. You can also use your own HDRI environment maps by placing the files in the directory Documents/AmbientOcclusion
- Illumination Enabled: When enabled, use the selected HDRI map to illuminated the scene. When disabled, the environment map is used only as background.
- Solid Color: In case that “Use Solid Color” is selected, this option allows to select the color to be used as environment.
- Gain: Increase or decrease the amount of environment illumination.
- Rotation: Change the orientation of the environment map.
- Download Environments: Here you can download extra HDRI environments for free.
- Use Solid Color: Use a single solid color as environment.
- MonumentValley.hdr: The environment map provided by default
Background: It’s possible to have a solid color as background as well as arbitrary images. A few background images are provided by default, and more can be downloaded for free by selecting “Download Backgrounds”. You can also use your own background images by placing the files in the directory Documents/AmbientOcclusion
- Solid Color: In case that “Use Solid Color” is selected, here you can select the appropriate solid color to use.
- Gain: Increase or decrease the intensity of the background.
- Download Backgrounds Here you can download extra background images for free.
- Use Solid Color Use a single solid color as background.
- Use Environment Use the selected environment from the menu “Environment” as background.
- blue_sky.jpg, etc. Background images provided by default.
Gain: Overall intensity of the rendered image.
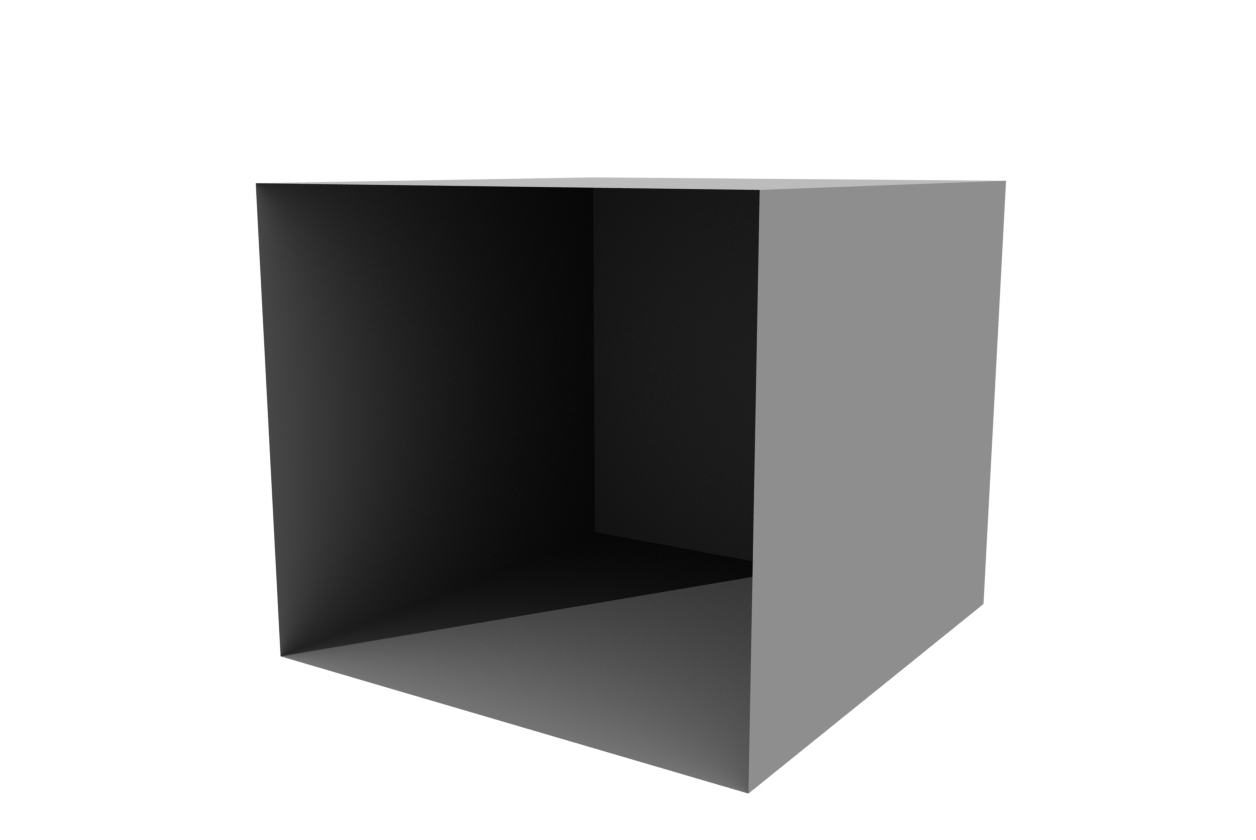
Occlusion Distance: The maximum distance used by the ambient occlusion algorithm to decide if an object is casting shadow on the current object. In the example below, the value of occlusion distance has been set to a big number. The result is that for every point inside the cube, all other faces of the cube will contribute to the shading of the point:
 In the example below, the value of occlusion distance has been set to 1 meter. In this case only the part of the faces that are distant less than 1 meter will contribute to the shading of each point, resulting in a brighter image:
 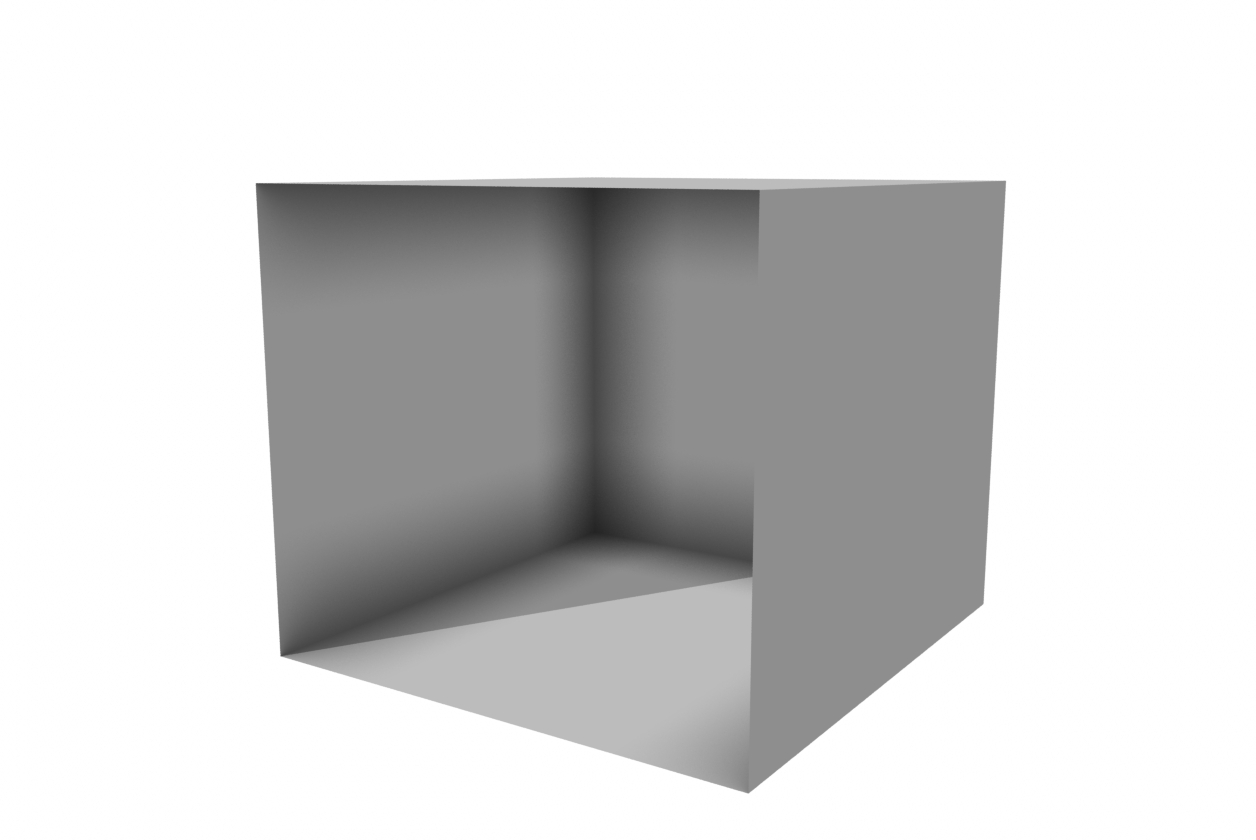 Reducing the occlusion distance can be useful especially in cases of highly occluded scenes, such as interiors.
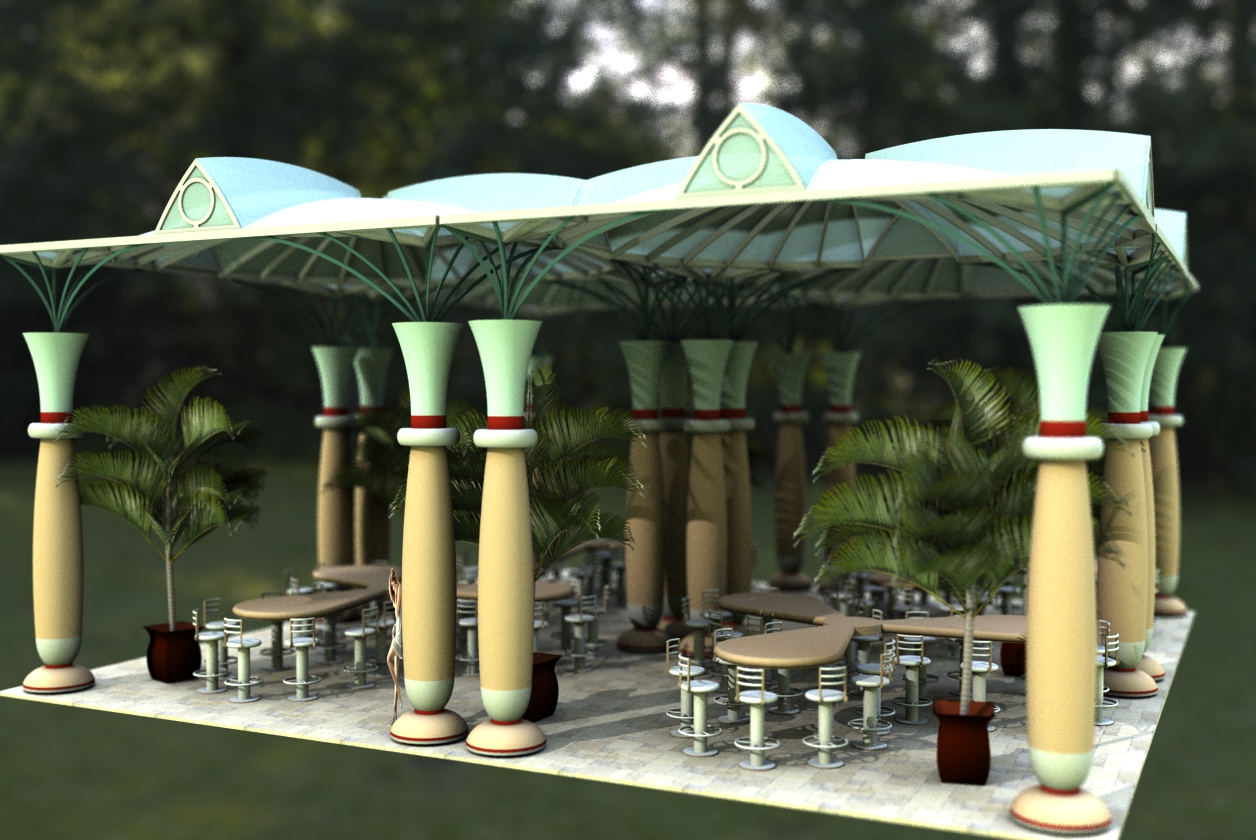
Lens Radius: The “Lens Radius” parameter allows to simulate depth of field in the scenes, so that objects that are closer or further from the focal distance will appear blurred. To disable depth-of-field, set the lens radius to zero. Here is an example of a scene rendered with a lens radius equal to 0.1, with the columns getting more and more blurred as the distance from the camera increases:
Shadow: This parameter controls the amount of sharp shadow. The shadow direction is determined by the time and date set in SketchUp.
- Enabled: When enabled, the result is a combination of ambient occlusion and sharp shadows. When disabled, only ambient occlusion shading is used.
- Contrast: the balance between sharp shadows and ambient occlusion. A value of one will result in only sharp shadows, while a value of zero will result in only ambient occlusion.
- Softness: the softness of sharp shadows.
Opacity: The overall opacity of the scene. A value between zero and one will make the scene semi-transparent.
Extra Help
You can get extra support in the AmbientOcclusion Forums: