
Viz Pro Manual
Contents
Containers
Some times it might be useful to group a series of nodes together for later reuse and share. Viz provide that functionality through the Contaner node.
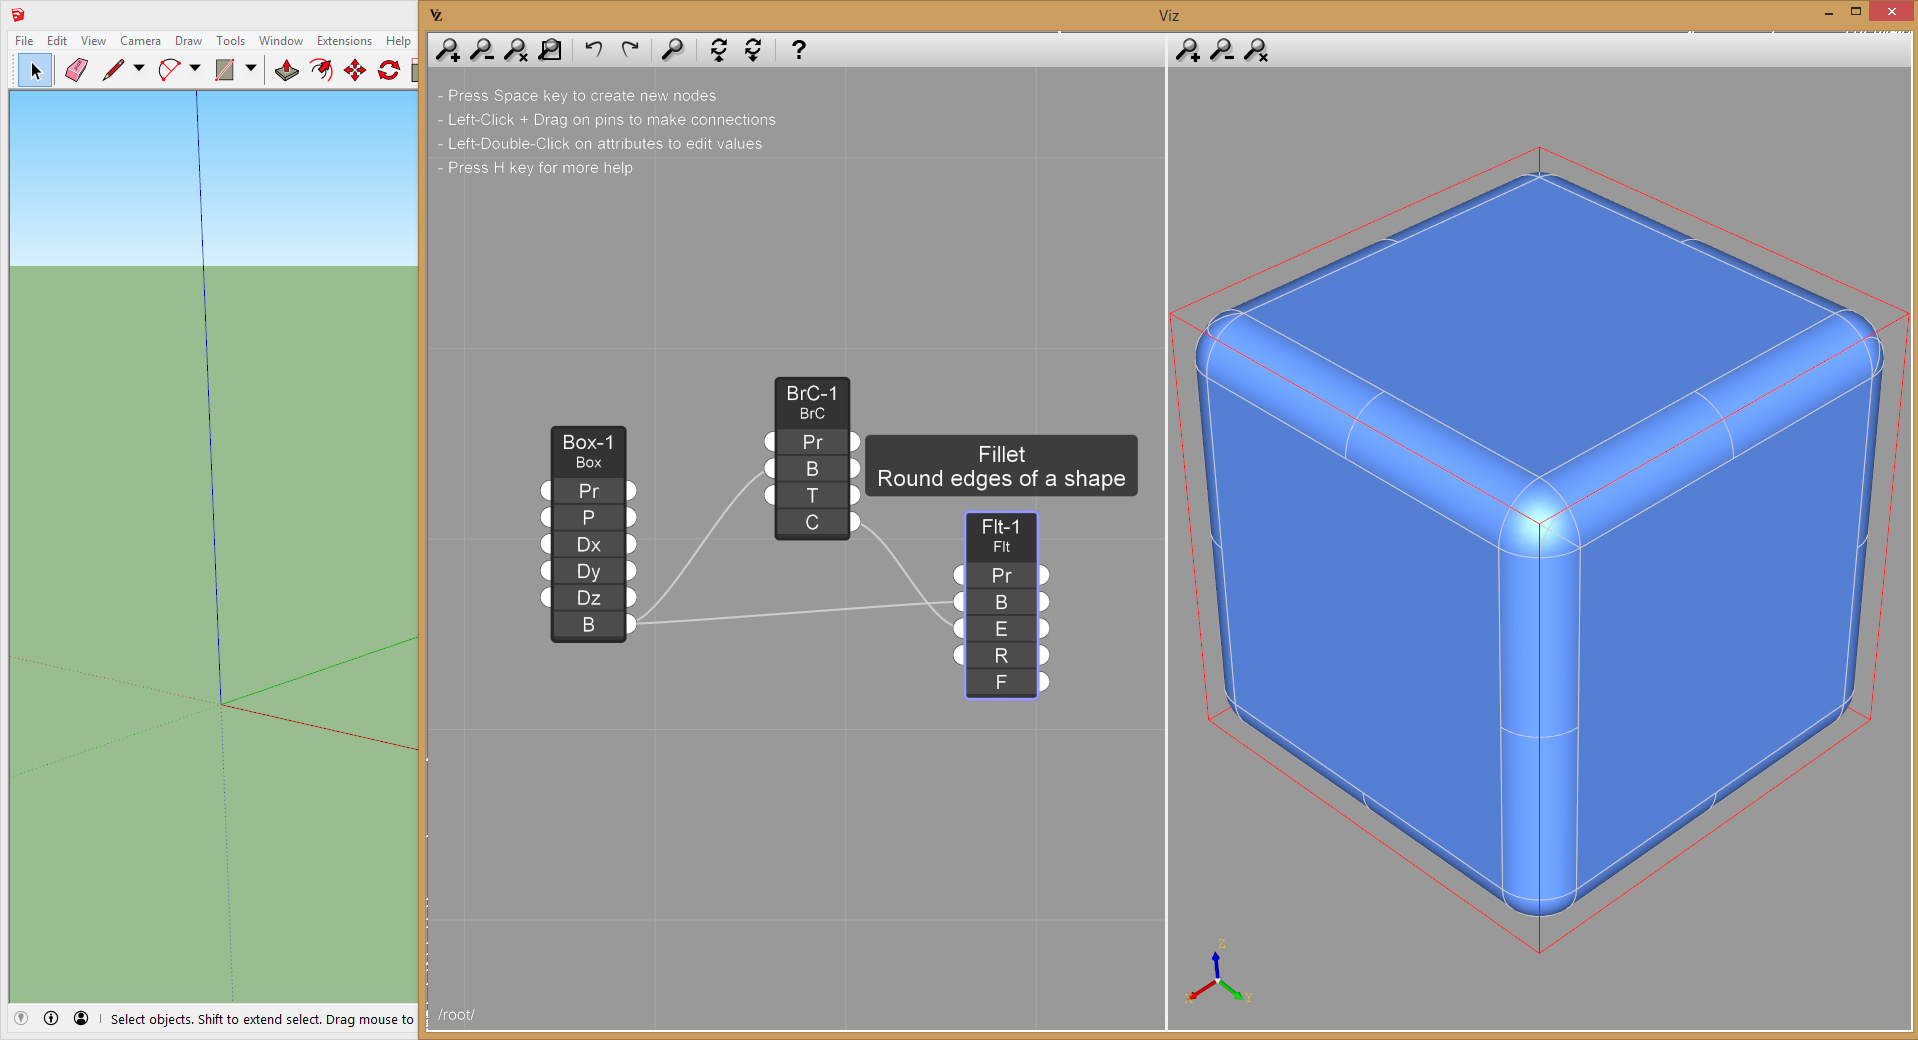
- Let’s say we have a couple of nodes that extract edges from a box and apply a fillet operation to it:
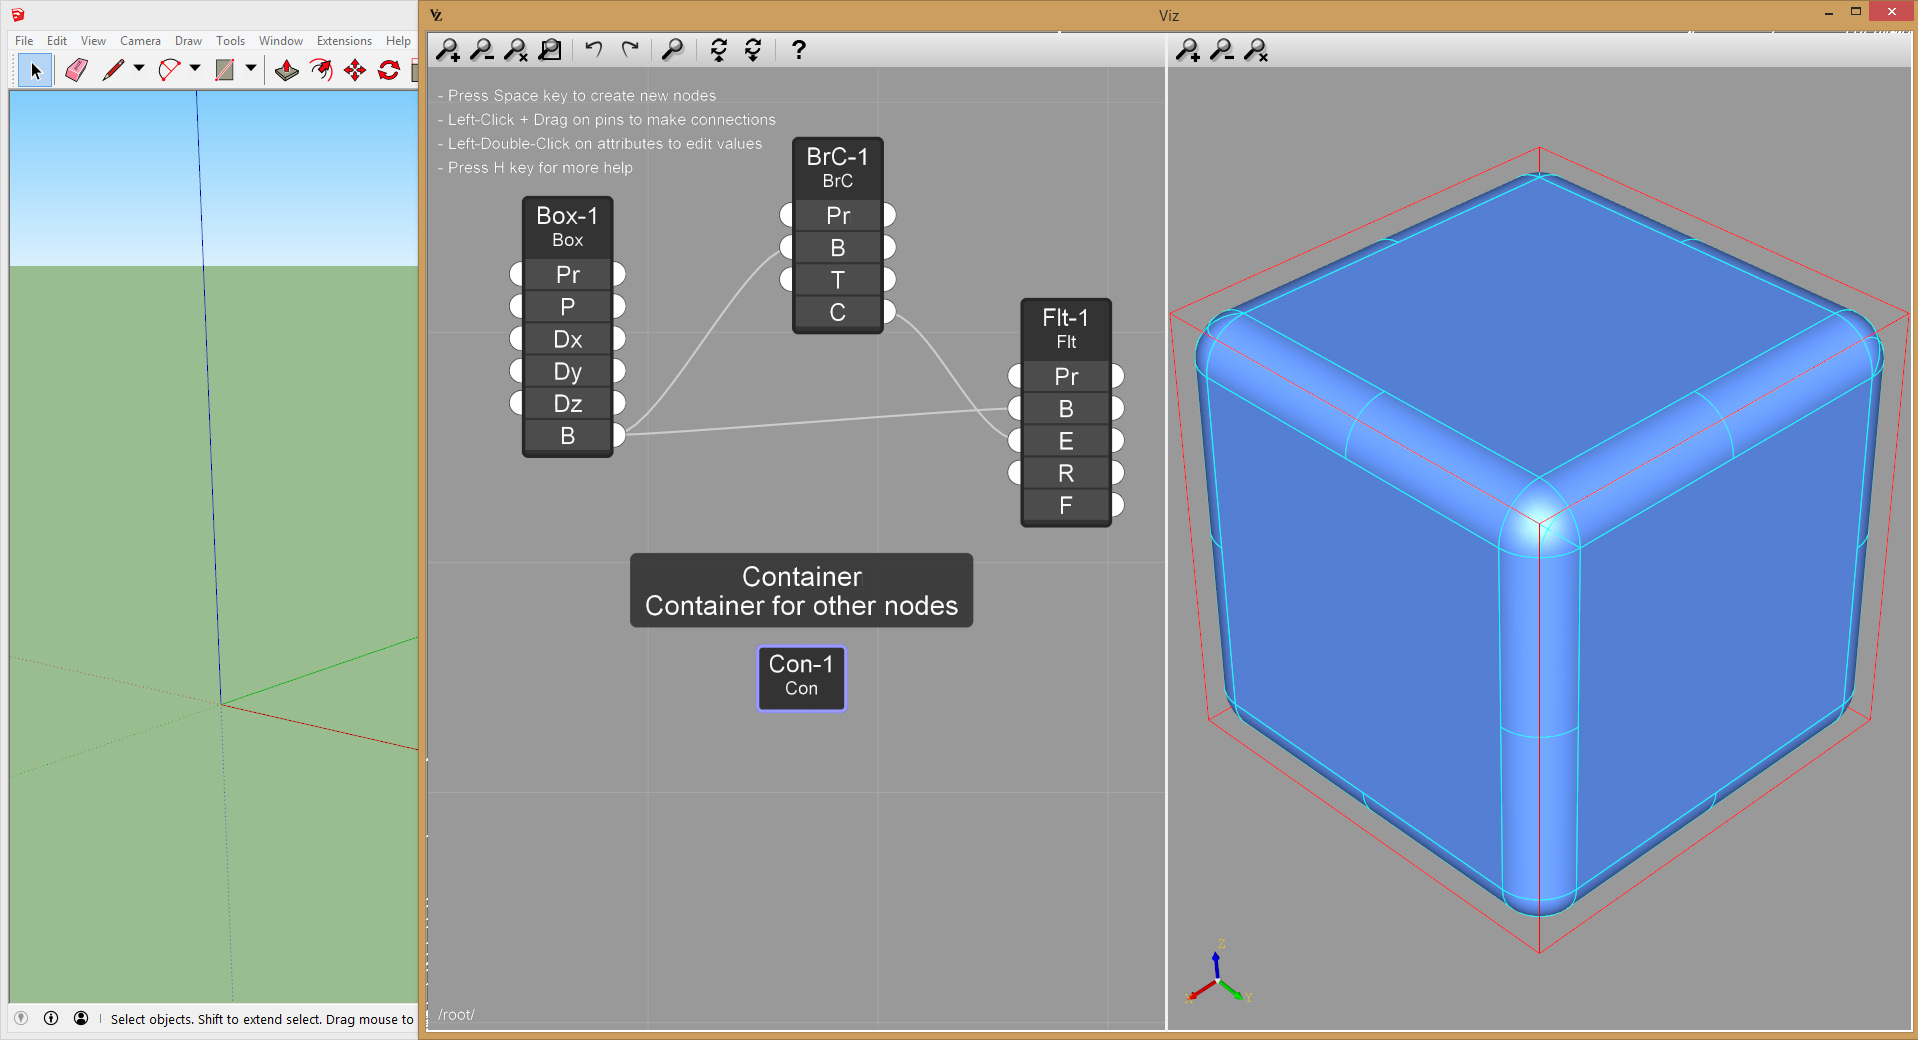
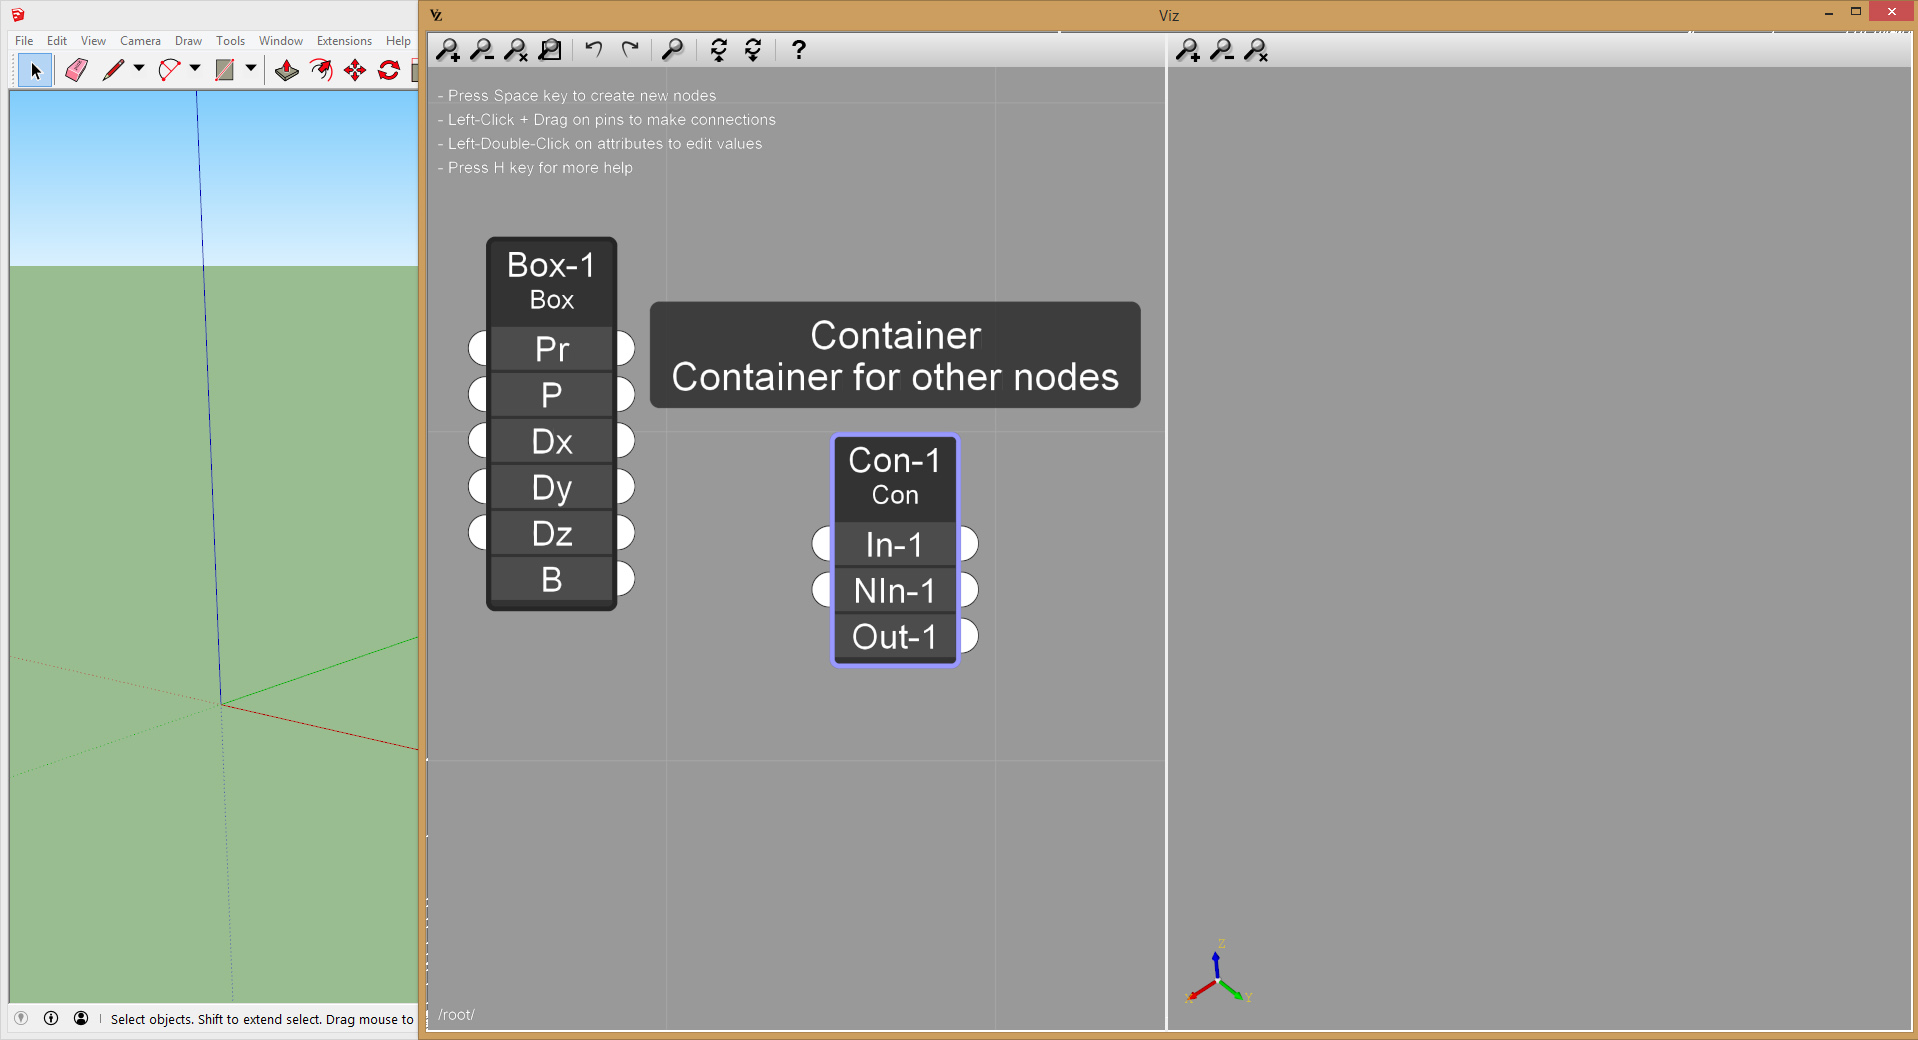
- We want to group that functionality into one node. Let’s start by creating a Container node:
- Press Alt + Double-Click on the Container node to go into the container for editing. You can press the Esc key to exit the container. The bottom left of the graph view will indicate if we are inside a container:

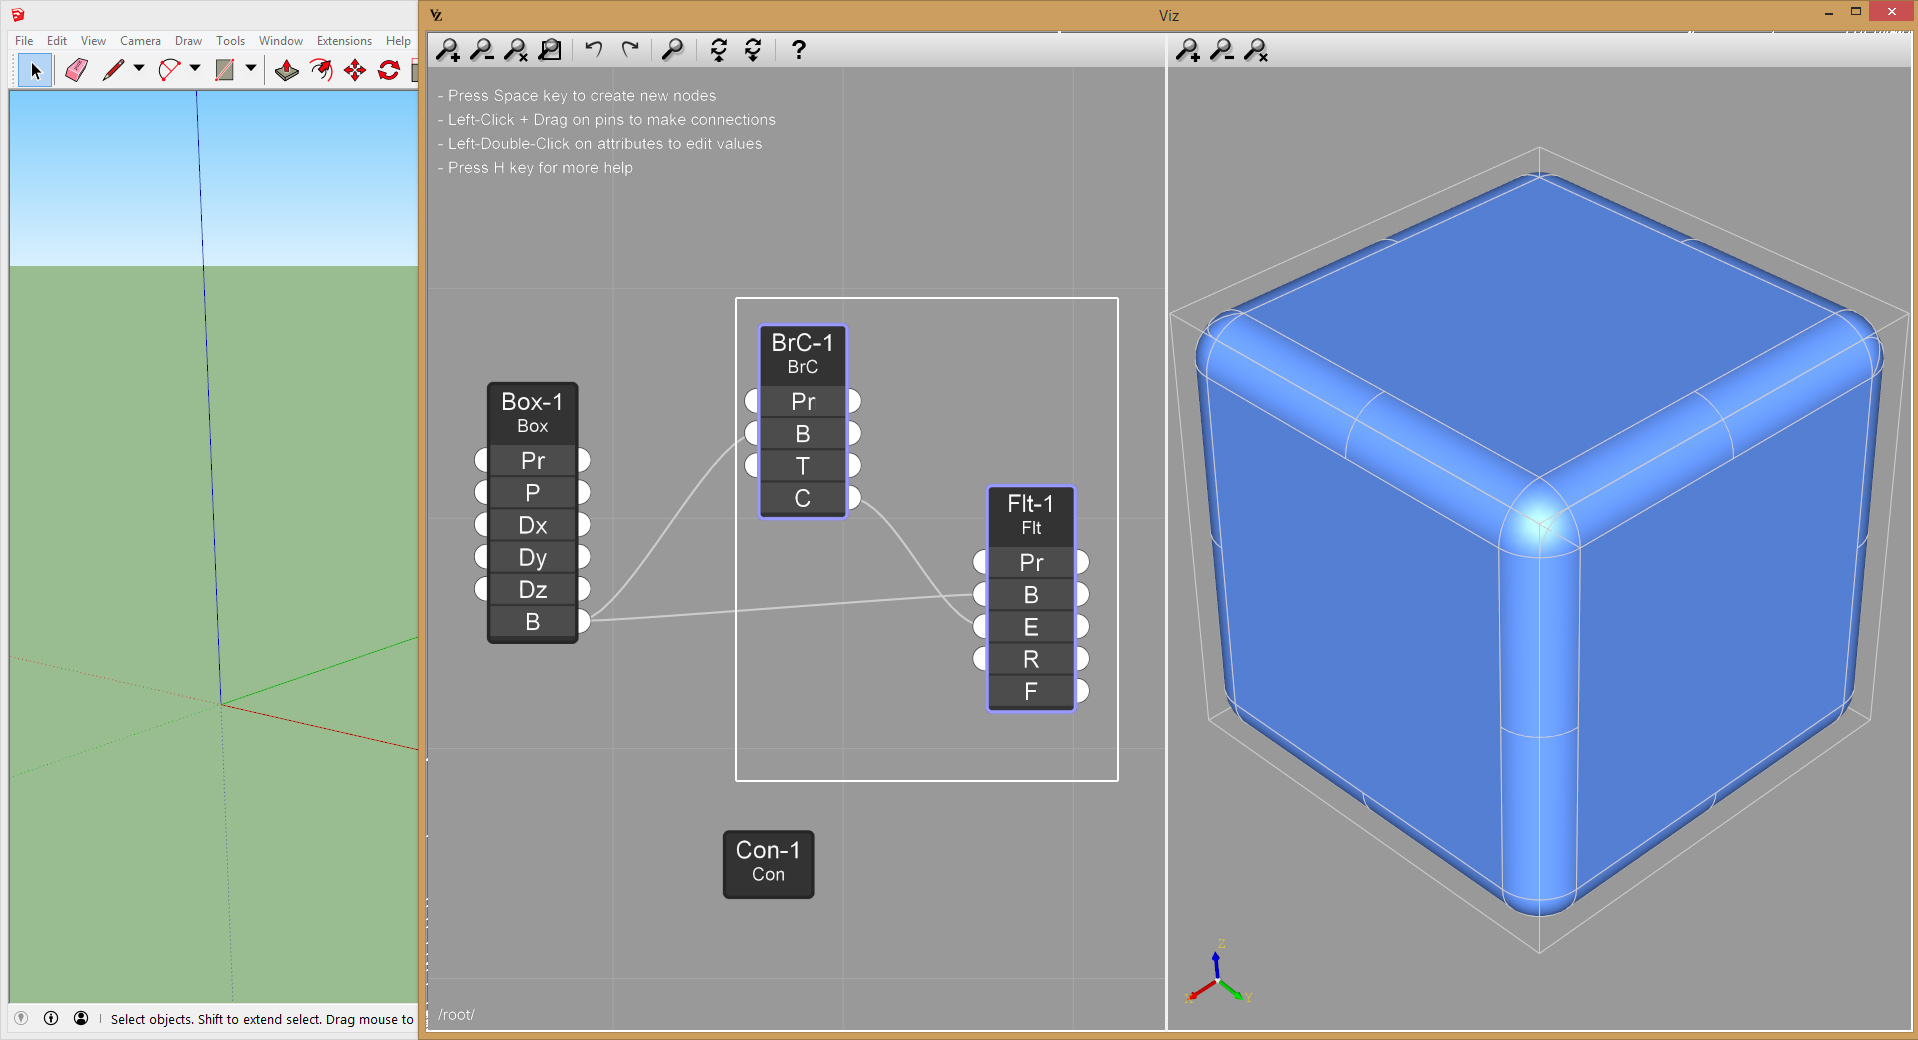
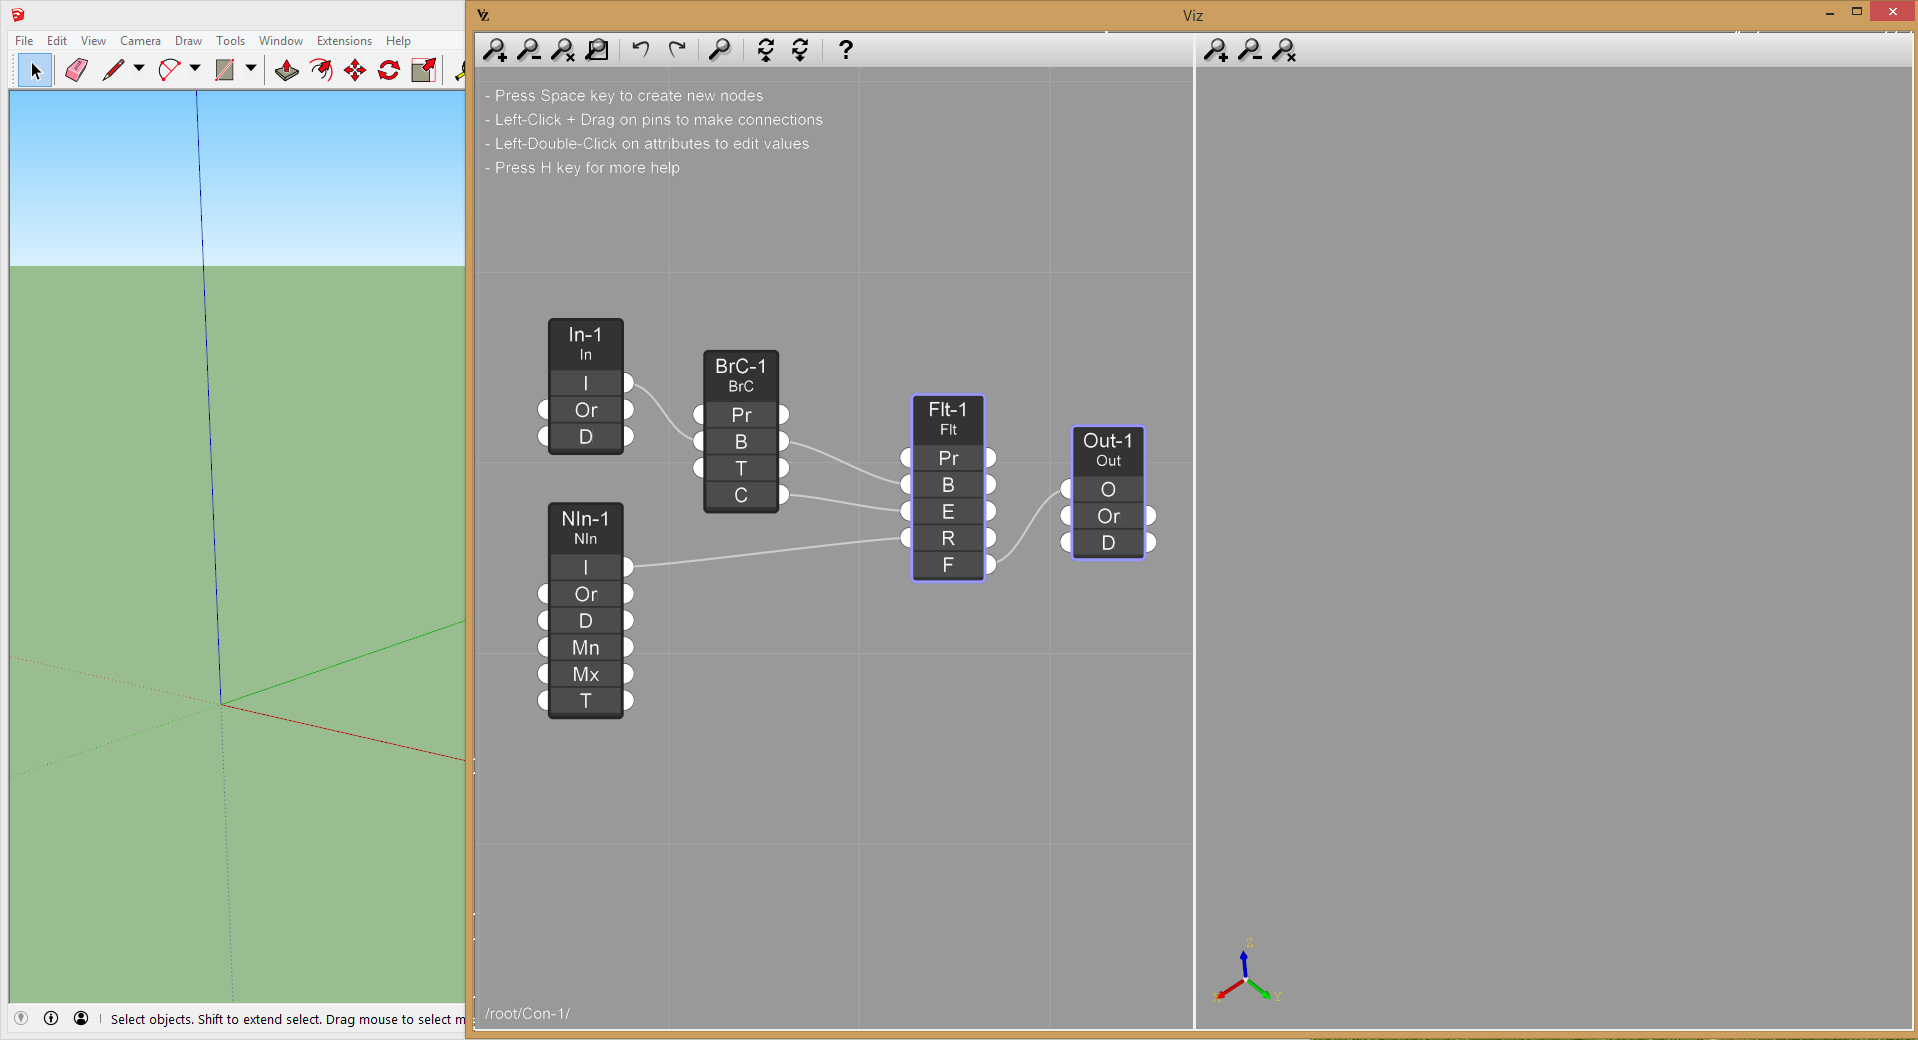
- Press Esc to make sure you are on the top level of the graph view. Now select the BRep Components node and the Fillet node and then press Ctrl + X (Windows) or Cmd + X (Mac) to cut the nodes, so we can later paste them inside the Container node:
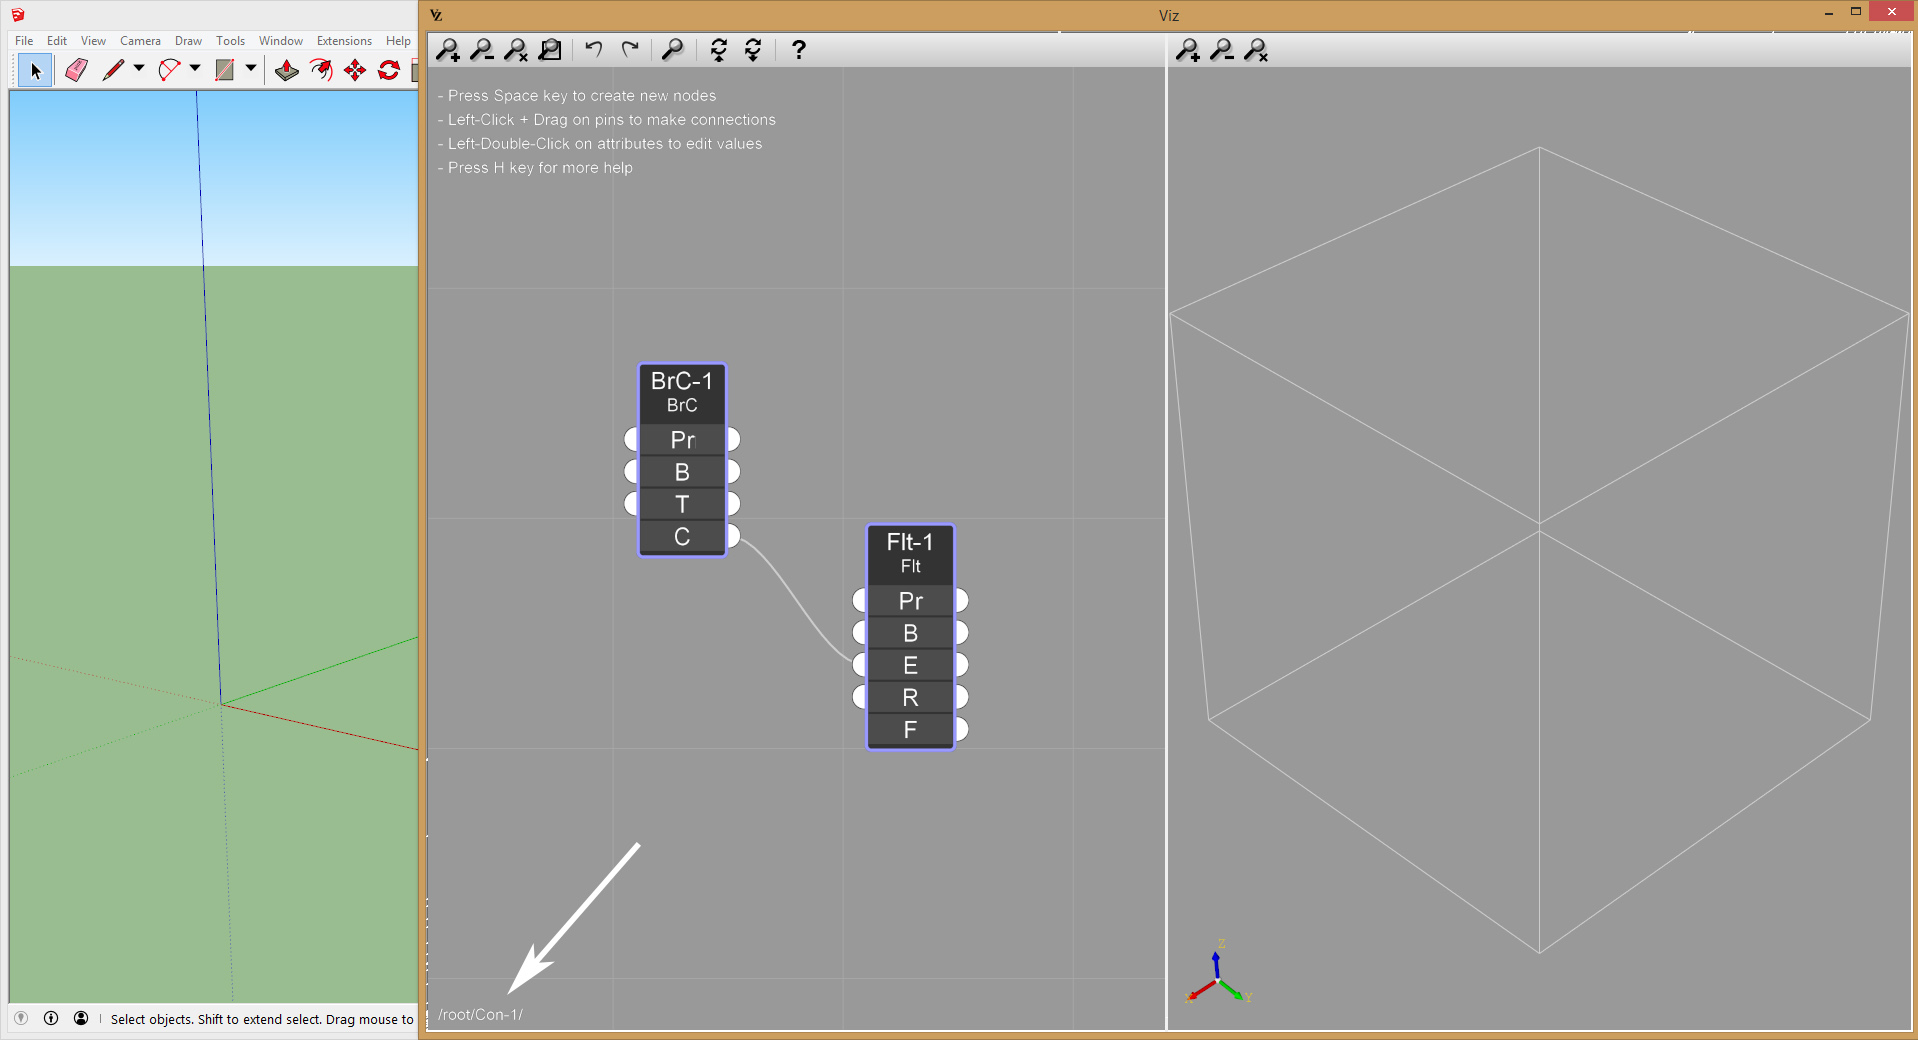
- Press Alt + Double-Click on the Container node to go inside it, then press Ctrl + V (Windows) or Cmd + V (Mac) to paste the nodes:
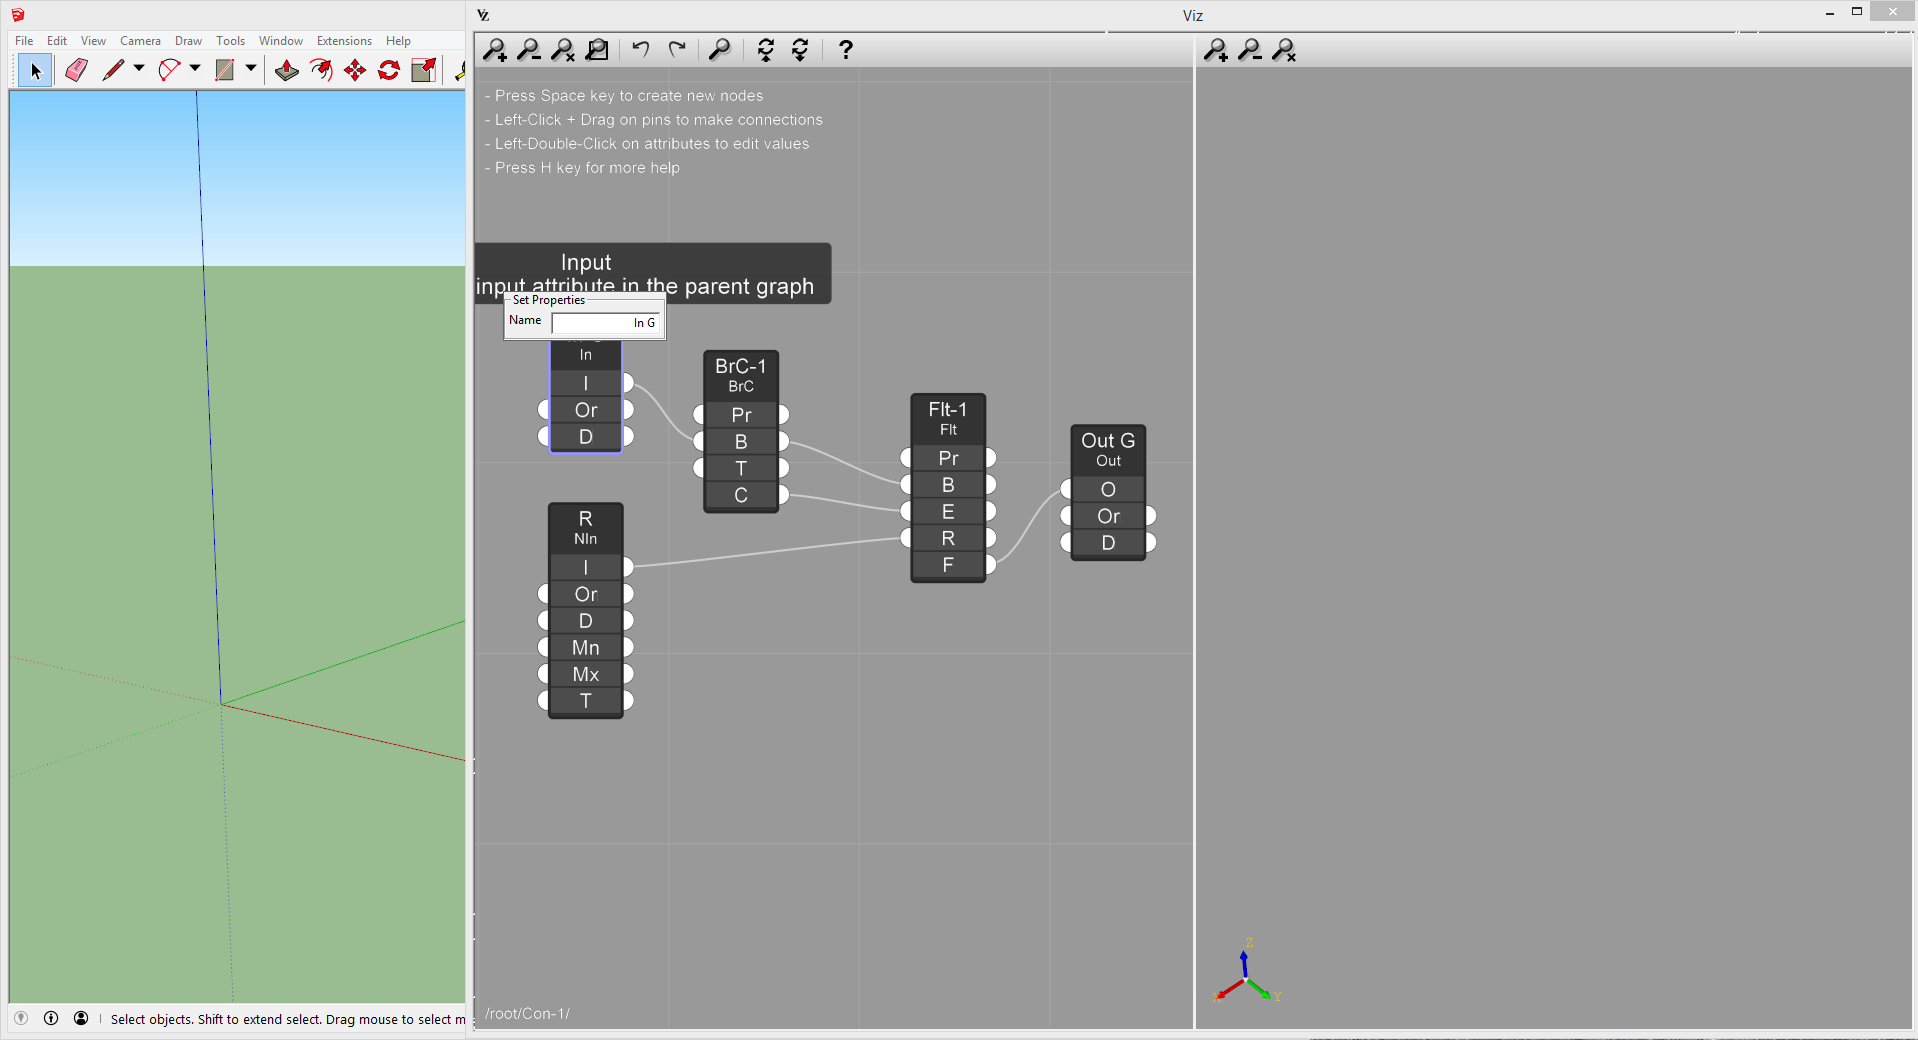
- Now add two nodes, Input and Output, which will be used to import geometry into the container and export geometry out of the container respectively. Make sure to connect the B attribute of the Brep Components node to the B attribute of the Fillet node. Also add a Numeric Input node, which will allow us to control the fillet radius from outside the container:
- Press the Esc key to exit the container. You can see that attributes have been created corresponding to the Input, Output and Numeric Input nodes:
- Go back into the Container node and Double-Click on the node names to assign them more suitable ones. Those name will be reflected to the names of the corresponding attributes of the container:
 And the corresponding attribute names:
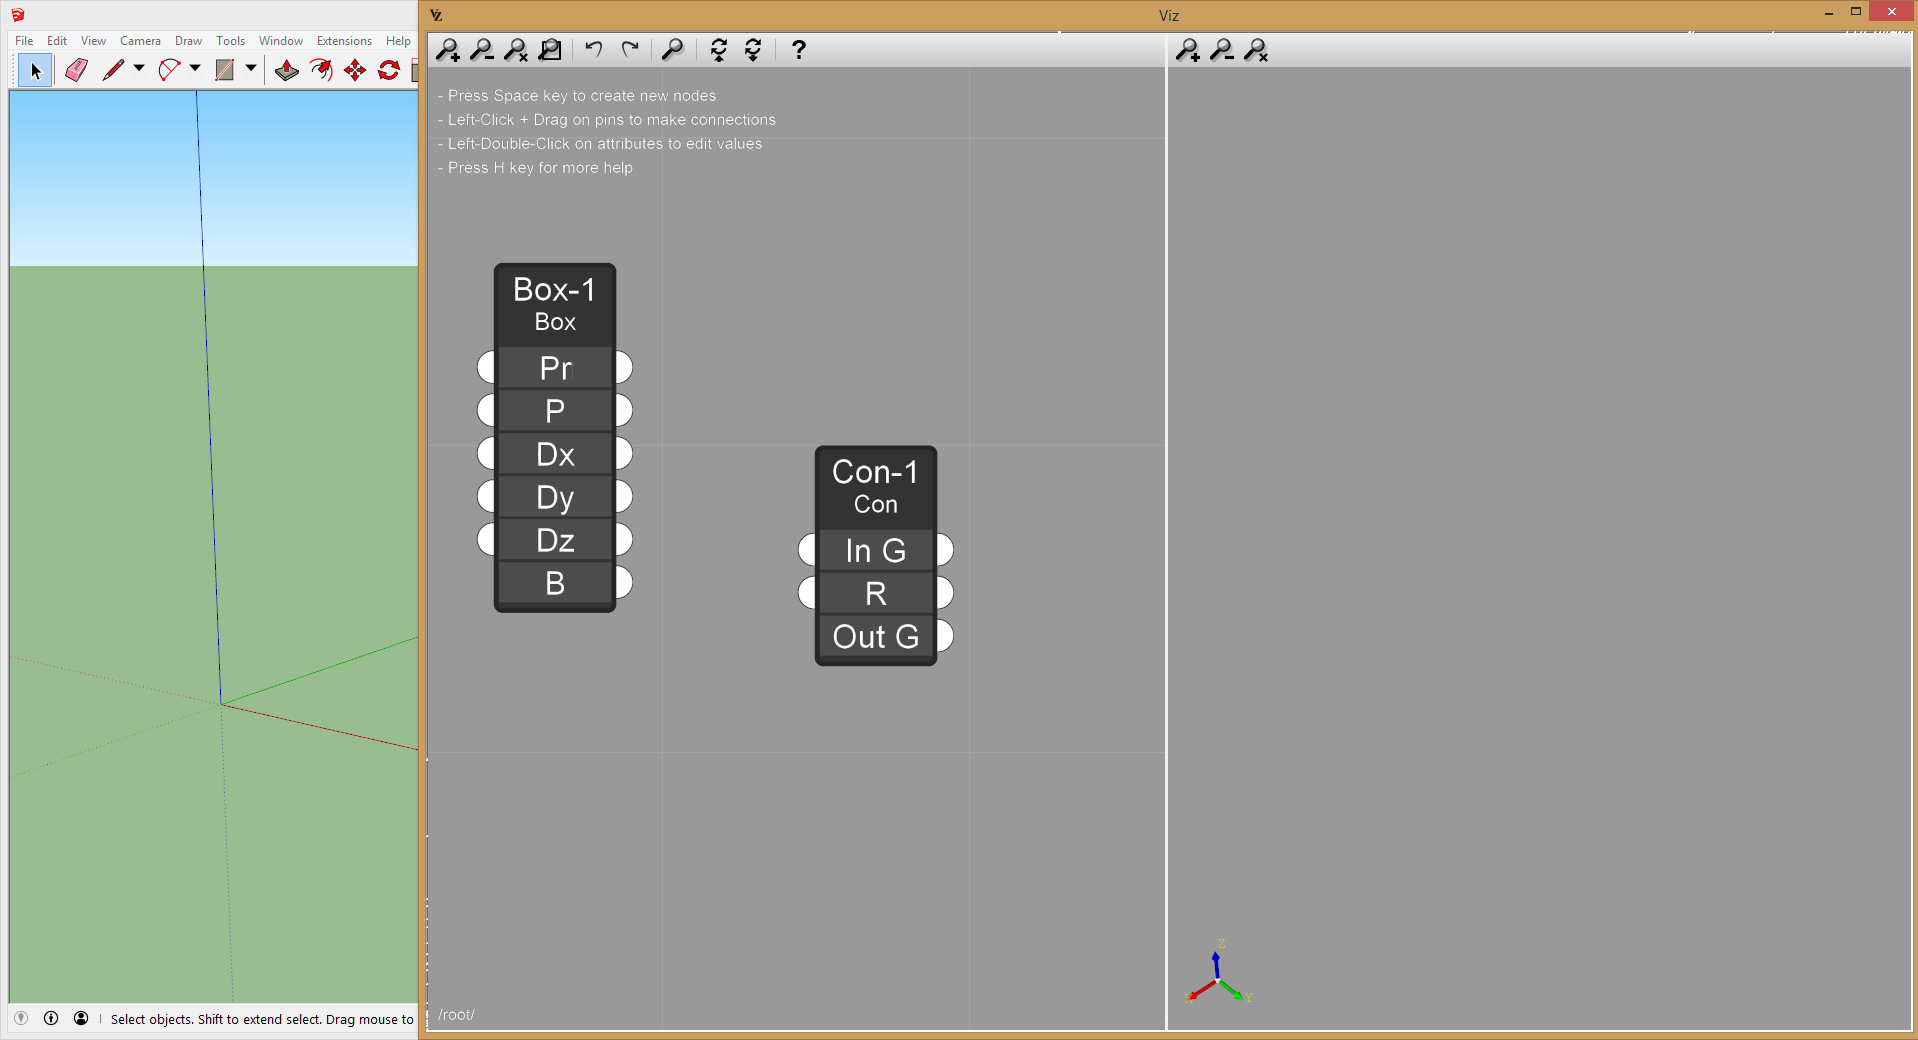
- Connect back the Box node to the Container node and Double-Click on the container name insert some descriptive details about the node, so they’ll be available later in the Create Node Dialog:

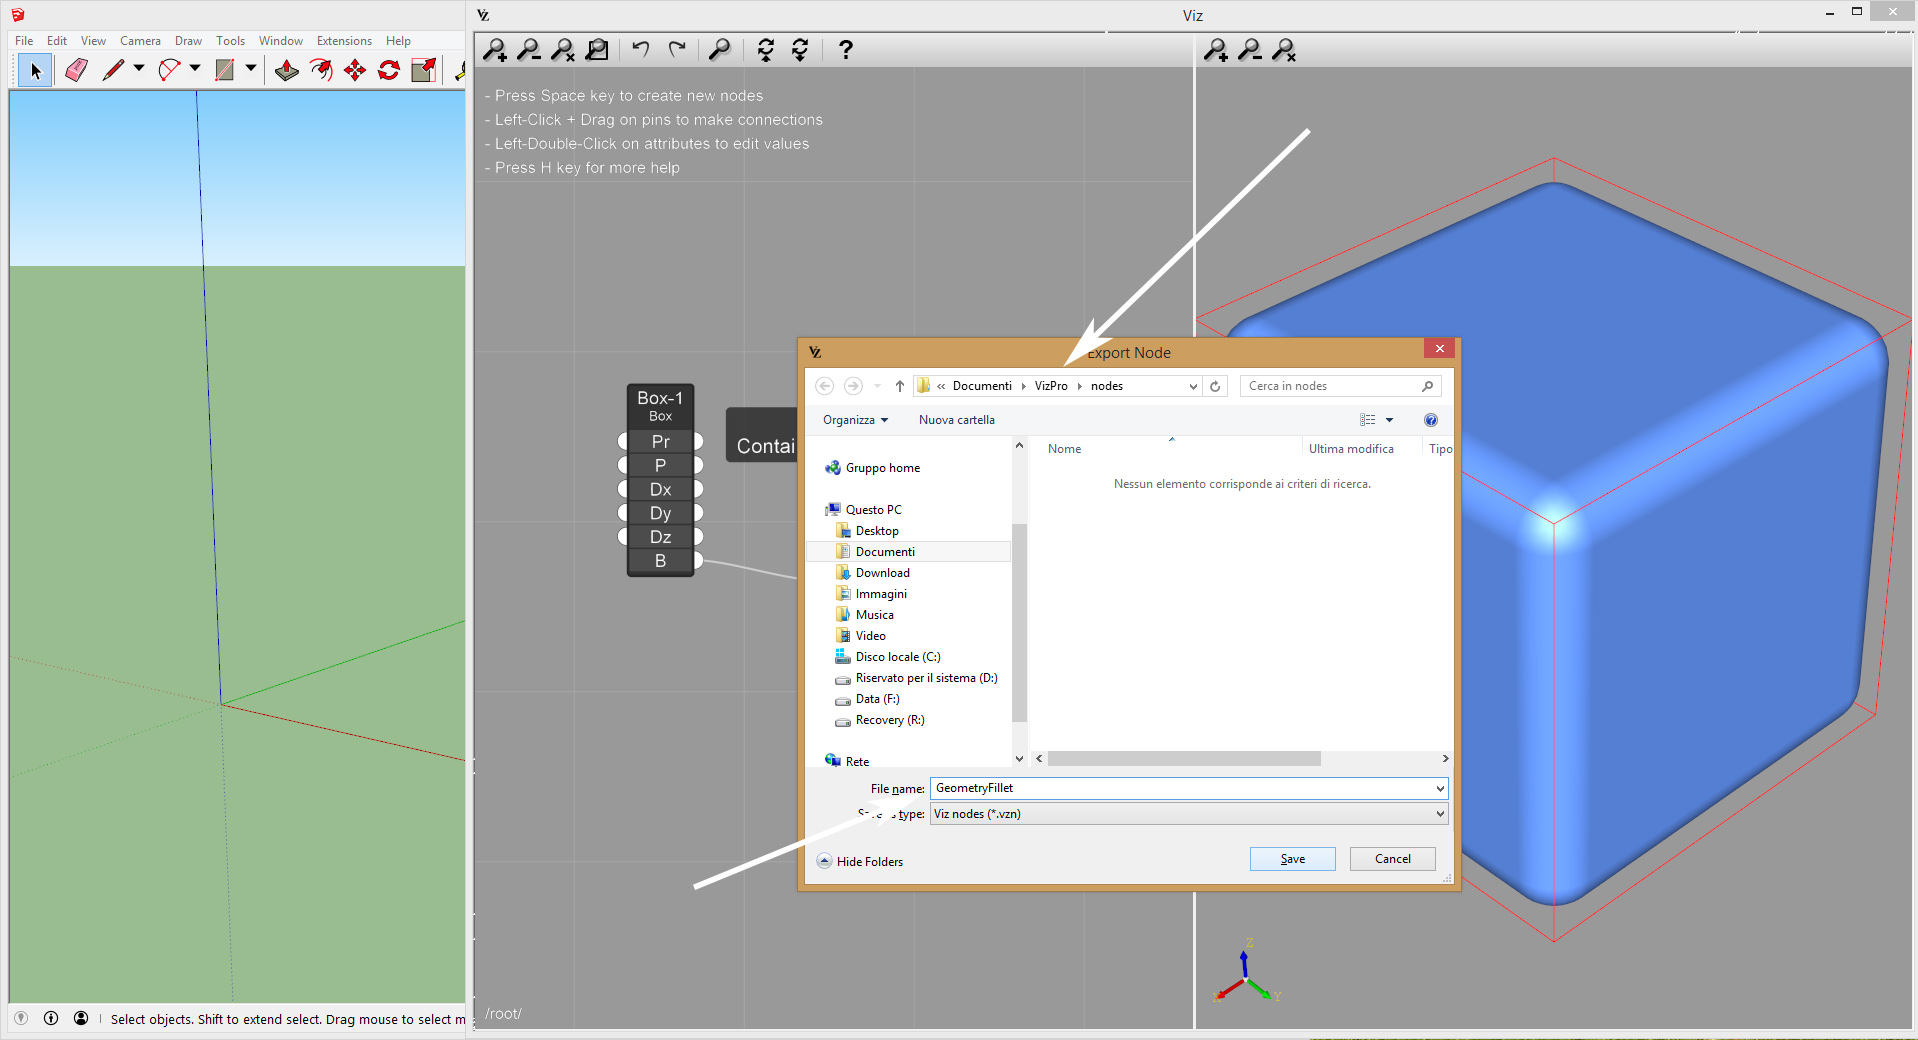
- Now it’s time to export the node for later use. Select the node and then press Ctrl + E (Windows) or Cmd + E (Mac), then select the name for the node, such as Geometric Fillet. Make sure to save the node in the directory Documents / Viz Pro / nodes.
- All the nodes saved in Documents / Viz Pro / nodes will be available in the Create Node Dialog:

- To share a node with other users, simply copy the exported file Geometric Fillet.vzn present in the directory Documents / Viz Pro / nodes to the same directory of another user.